[vc_row][vc_column][vc_column_text]
- The history and cultural significance of henna
Henna, also known as mehndi, is a traditional form of body art that has been practiced for thousands of years across various cultures in the Middle East, North Africa, and South Asia. The use of henna dates back to ancient times, with evidence of henna being used as early as the Bronze Age in the Eastern Mediterranean.
Henna was originally used for medicinal purposes and was believed to have healing properties. Over time, it evolved into a form of decorative art that was used to adorn the skin for special occasions and celebrations.
In many cultures, henna is considered a symbol of good luck, blessings, and protection. It is often applied to the hands and feet of brides before their wedding day as a way to ward off evil spirits and bring good fortune to the marriage. Henna is also used to celebrate other special occasions, such as Eid al-Fitr, Diwali, and other cultural festivals.
Henna designs and patterns vary widely depending on the region and culture. In North Africa, Henna Designs are characterized by bold geometric shapes and patterns. In the Middle East, henna designs often include intricate floral and paisley patterns. In South Asia, henna is used to create highly detailed designs that often cover the hands and arms of the wearer.
The use of henna has spread around the world, and today it is enjoyed by people of all cultures and backgrounds. In addition to its traditional uses, henna is now used as a form of temporary body art for festivals, concerts, and other events. It has also been incorporated into fashion and beauty, with henna-inspired designs appearing on clothing, jewelry, and other accessories.
Overall, henna continues to be a beloved and important part of many cultures around the world. Its rich history and cultural significance have made it a cherished tradition that will continue to be celebrated for generations to come.
- The different types of henna and their characteristics
There are several different types of henna, each with its own unique characteristics and uses. Here are some of the most common types of henna and what sets them apart:
- Traditional Henna: This is the most common type of henna and is made from the dried leaves of the henna plant. Traditional henna produces a red-brown stain on the skin, which can vary in intensity depending on the quality of the henna and the length of time it is left on the skin.
- Black Henna: Black henna is not made from the henna plant but is instead a synthetic dye that contains the chemical para-phenylenediamine (PPD). Black henna is not considered safe and can cause severe skin reactions, so it is not recommended for use.
- White Henna: White henna is a temporary body paint that is applied to the skin using a brush or stencil. It does not contain henna and is typically made from a mixture of body paint and adhesive.
- Jagua Henna: Jagua henna is made from the fruit of the jagua tree and produces a bluish-black stain on the skin. It is often used as an alternative to black henna and is considered safe when used properly.
- Colored Henna: Colored henna is made by adding natural or synthetic pigments to traditional henna. It can produce a range of colors, including blue, green, purple, and pink. However, colored henna may not be safe or long-lasting, and it is not recommended for use on the skin.
When choosing a type of henna, it is important to consider its safety and effectiveness. Traditional henna and jagua henna are considered safe and produce long-lasting stains on the skin. It is also important to choose high-quality henna and to follow proper application techniques to ensure the best results.
- Popular henna designs and patterns
Henna designs and patterns vary widely depending on the culture, region, and occasion. Here are some of the most popular henna designs and patterns:
- Arabic: Arabic henna designs are characterized by bold, flowing lines and intricate floral and paisley patterns. They often cover the entire hand and extend up the arm.
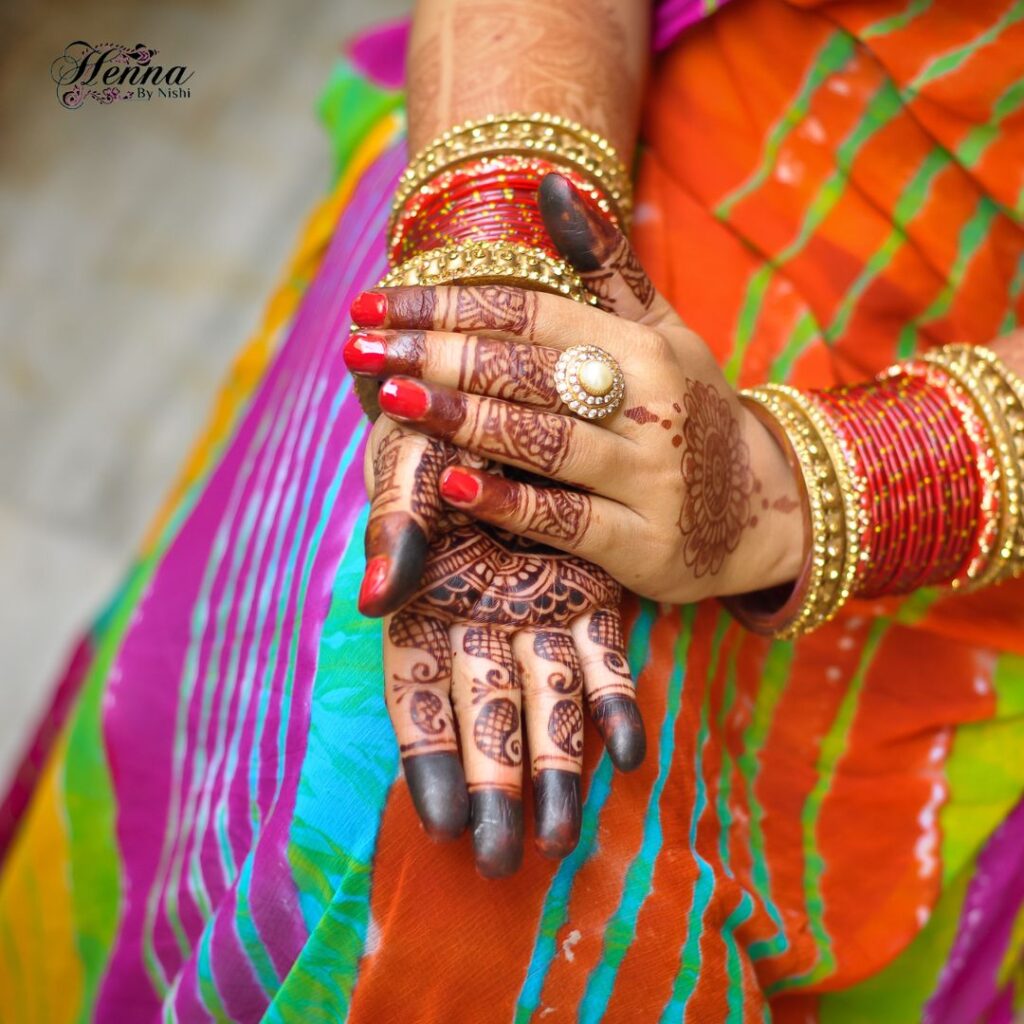
- Indian: Indian henna designs are highly detailed and often feature fine lines and intricate mandala patterns. They typically cover the palm and the back of the hand, and may also extend up the arm.
- Moroccan: Moroccan henna designs are characterized by geometric shapes and patterns, including triangles, diamonds, and squares. They are often bold and symmetrical and may be used to create a repeating pattern across the hand and arm.
- African: African henna designs often feature bold, graphic shapes and patterns, including dots, lines, and triangles. They may be used to create a repeating pattern or may be applied to specific areas of the hand or body.
- Modern: Modern henna designs often incorporate a mix of traditional and contemporary elements, including graphic shapes, text, and images. They may also be used to create customized designs based on the individual’s preferences and interests.
Henna designs can be customized and adapted to suit a variety of occasions, from weddings and festivals to everyday wear. The key is to choose a design and pattern that reflects your personal style and preferences and to work with a skilled henna artist who can bring your vision to life.
- How to prepare and apply henna
Preparing and applying henna can be a fun and rewarding experience. Here are the basic steps to prepare and apply henna:
- Purchase high-quality henna: Choose a henna that is fresh, finely sifted, and free of additives or chemicals. Some of the best henna are made from the leaves of the Lawsonia inermis plant.
- Mix the henna paste: Combine the henna powder with a liquid such as lemon juice, tea, or water. The mixture should be thick, smooth, and free of lumps. Allow the mixture to rest for a few hours or overnight to allow the dye to develop.
- Choose a design: Decide on the design you want to create and practice drawing it on paper or your skin.
- Cleanse and prepare the skin: Wash the area where you will be applying the henna with soap and water to remove any dirt, oil, or lotion. Dry the skin completely.
- Apply the henna: Using a cone or applicator bottle, apply the henna to the skin in the desired pattern. Take care to keep the lines clean and precise, and to avoid smudging or smearing the henna.
- Let the henna dry: Allow the henna to dry completely, which can take anywhere from 30 minutes to several hours depending on the temperature and humidity.
- Seal the henna: Once the henna is dry, apply a mixture of sugar and lemon juice or a clear sealant to the design to help it set and to protect it from smudging.
- Remove the henna: Gently scrape off the dried henna with a plastic spatula or fingernail. Avoid using water for at least 12-24 hours to allow the color to deepen and develop.
- Care for the henna: To maintain the color and longevity of the henna, avoid exposure to water, soap, or lotion for the first 24-48 hours. Apply a thin layer of oil or balm to the design to help it last longer.
With practice and patience, you can create beautiful henna designs and patterns that are both unique and meaningful. Just be sure to choose high-quality henna and work with a skilled henna artist if you are unsure about the process.
- Tips for getting a beautiful and long-lasting henna stain
Getting a beautiful and long-lasting henna stain requires preparation, technique, and aftercare. Here are some tips to help you achieve a beautiful and long-lasting henna stain:
- Choose high-quality henna: The quality of the henna is crucial for getting a good stain. Choose a fresh, finely sifted henna that is free of additives and chemicals.
- Prepare the skin: Wash the skin thoroughly to remove any dirt, oil, or lotion. Dry the skin completely before applying the henna.
- Use a good applicator: A good applicator is essential for achieving clean, precise lines. Use a henna cone or an applicator bottle with a fine tip.
- Keep the henna on for at least 6-8 hours: The longer you keep the henna on, the darker and longer-lasting the stain will be. You can keep the henna on for up to 12-24 hours for the best results.
- Seal the henna: Once the henna is dry, apply a mixture of sugar and lemon juice or a clear sealant to the design to help it set and to protect it from smudging.
- Keep the skin warm: Keeping the skin warm can help the henna stain better. You can cover the henna design with plastic wrap or wear gloves to keep the warmth in.
- Avoid water for at least 24-48 hours: Water can cause the henna to fade quickly. Avoid washing the hennaed area with water or exposing it to water for at least 24-48 hours.
- Moisturize the skin: After the henna has dried and you have removed the sealant, apply a thin layer of oil or balm to the design to help it last longer and to keep the skin moisturized.
- Protect the henna: Avoid exposing the hennaed area to direct sunlight or harsh chemicals, as they can cause the henna to fade quickly.
By following these tips, you can get a beautiful and long-lasting henna stain that will last for up to 1-3 weeks. Remember that every person’s skin is different, and the final color of the henna stain will vary depending on your skin type and how long you keep the henna on.
- Where to buy henna supplies and tools
If you’re interested in purchasing henna supplies and tools, here are some places where you can find them:
- Online stores: There are several online stores that specialize in henna supplies, such as Henna Caravan, Artistic Adornment, and the Henna Page Marketplace. These stores offer a wide range of henna products, including henna powder, cones, applicator bottles, stencils, and more.
- Local markets: Depending on where you live, you may be able to find henna supplies at local markets or specialty stores. Look for stores that sell natural or organic beauty products, as they may carry henna products.
- Indian or Pakistani grocery stores: If you have a local Indian or Pakistani grocery store, they may sell henna powder, cones, or pre-made henna paste.
- Craft stores: Some craft stores may carry henna supplies, such as stencils, applicator bottles, and brushes.
- International festivals and events: International festivals and events may feature henna artists and vendors who sell henna supplies and tools.
When purchasing henna supplies and tools, it’s important to choose high-quality products to ensure the best results. Look for products made from natural ingredients and free of chemicals or additives. Before purchasing henna powder, read reviews to ensure that the powder is finely sifted and has a good dye content. If purchasing pre-made henna paste, make sure it’s fresh and has been made recently. With the right supplies and tools, you can create beautiful henna designs with ease.
- Resources for learning more about henna
There are several resources available for learning more about henna, including Henna by Nishi:
- Henna books: There are many books available on henna art and design, including “Mehndi: The Art of Henna Body Painting” by Carine Fabius and “The Henna Body Art Kit” by Alex Morgan. These books cover everything from henna history and culture to design techniques and aftercare.
- Online tutorials: There are many free online tutorials available on YouTube and other websites. These tutorials cover everything from basic henna design techniques to more advanced designs.
- Henna workshops and classes: Many henna artists offer workshops and classes where you can learn the art of henna in a hands-on environment. Look for local henna artists in your area or check out online classes offered by Henna Caravan or Artistic Adornment.
- Henna forums and communities: The Henna Page Forum is a popular online community where henna artists and enthusiasts can connect and share tips, tricks, and designs.
- Henna artist websites and social media: Many henna artists have their own websites and social media accounts where they share their work and offer tips and tutorials. Henna by Nishi, for example, has a website where you can view her portfolio and book appointments for henna services.
By utilizing these resources, you can learn more about the history and culture of henna, as well as tips and techniques for creating beautiful henna designs. Whether you’re a beginner or an experienced Henna Artist, there’s always something new to learn and discover in the world of henna.[/vc_column_text][/vc_column][/vc_row]
